Lessons
Intro
Preview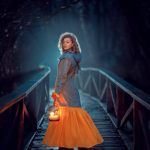
Welcome to the Night Photography tutorial
1. Scene conditions and equipment

A description ot the scene, night photography tips, equipment, camera settings
2. RAW file development

Now let’s get to the photos.
For viewing pictures I use Adobe Bridge, for development – Camera Raw converter – built-in Adobe Photoshop converter.
If you’re more used to working in Lightroom, you can use it. These two converters, Camera Raw and Lightroom, work on the same engine and almost all of the available features overlap.
3. Adobe Photoshop panels for work

Now we can see our image and different panels.
I’ll go over them quickly and tell you which ones we need.
4. Retouching methods

Techniques for working with photos
5. Transforming the image

In this part we will talk about
cropping and reshaping objects.
6. Skin retouching

Working with skin
7. Lights and shadows. Adding volume

To make our photo more vivid, expressive we will intensify the lights and darken the shadows.
8. Color correction

Now we come to my favorite part of the work – working with color.
With color, we can make our work more unique and unrepeatable.
9. LAB mode

The mode in which we worked – Prophoto RGB has a large color range and gives us great opportunities for working with photography.
But in Adobe Photoshop there is another mode that interprets colors in its own way and gives us other possibilities for working with photos.
10. Enhancements

There are a few more items left in our retouching.
The techniques that we will look at in this part will not only help us make the main subject of photography brighter and more interesting, but also add attractiveness and originality to our photos.
 Cart is empty